Fix It Right Plumbing

Plumbing Services in Australia

Fix It Right Plumbing Logo
✆ Call Us
  • Fix It Right Plumbing Logo
  • Reviews
  • Areas We Service
    • Geelong
      • Barwon Heads
      • Clifton Springs
      • Corio
      • Drysdale
      • Highton
      • Jan Juc
      • Lara
      • Leopold
      • Newcomb
      • Ocean Grove
      • Point Lonsdale
      • Portarlington
      • Queenscliff
      • Torquay
      • Waurn Ponds
      • Whittington
      • Saint Leonards
    • Bayside Suburbs
      • Aspendale
      • Beaumaris
      • Black Rock
      • Chelsea
      • Cheltenham
      • Frankston
      • Hampton
      • Highett
      • Mentone
      • Moorabbin
      • Mordialloc
      • Ormond
      • Parkdale
      • Patterson Lakes
      • Sandringham
      • Seaford
    • Northern Suburbs
      • Ascot Vale
      • Brunswick
      • Bundoora
      • Coburg
      • Doncaster
      • Donvale
      • Eltham
      • Essendon
      • Fitzroy
      • Flemington
      • Greensborough
      • Ivanhoe
      • Kensington
      • Montmorency
      • Moonee Ponds
      • Northcote
      • Nunawading
      • Preston
      • Research
      • Reservoir
      • Rosanna
      • Templestowe
      • Thornbury
      • Epping
      • Sunbury
      • Craigieburn
    • Melbourne
      • Abbotsford
      • Albert Park
      • Alphington
      • Bentleigh
      • Brighton
      • Carlton
      • Caulfield
      • Collingwood
      • Elsternwick
      • Elwood
      • Hawthorn
      • Kew
      • Malvern
      • Middle Park
      • Parkville
      • Prahran
      • Richmond
      • South Yarra
      • St Kilda
      • Toorak
    • Eastern Suburbs
      • Ashwood
      • Bayswater
      • Belgrave
      • Berwick
      • Boronia
      • Box Hill
      • Burwood
      • Chadstone
      • Chirnside Park
      • Clayton
      • Croydon
      • Dandenong
      • Endeavour Hills
      • Ferntree Gully
      • Glen Waverley
      • Hallam
      • Heathmont
      • Keysborough
      • Kilsyth
      • Lilydale
      • Montrose
      • Mooroolbark
      • Mount Waverley
      • Narre Warren
      • Noble Park
      • Oakleigh
      • Park Orchards
      • Ringwood
      • Rowville
      • Scoresby
      • Springvale
      • Surrey Hills
      • Upwey
      • Vermont
      • Wantirna
      • Warrandyte
      • Warranwood
      • Wheelers Hill
      • Armadale
      • Camberwell
      • Knox
      • Viewbank
      • Pakenham
    • Western Suburbs
      • Altona
      • Altona Meadows
      • Derrimut
      • Footscray
      • Hoppers Crossing
      • Kingsville
      • Laverton
      • Maribyrnong
      • Newport
      • Pascoe Vale
      • Point Cook
      • Port Melbourne
      • Seddon
      • Strathmore
      • Sunshine
      • Truganina
      • Werribee
      • Williamstown
      • Yarraville
    • Plumber Mornington
      • Balnarring
      • Blairgowrie
      • Botanic Ridge
      • Carrum Downs
      • Cranbourne
      • Hastings
      • Langwarrin
      • Lynbrook
      • Mornington
      • Mount Eliza
      • Mount Martha
      • Pearcedale
      • Portsea
      • Red Hill
      • Rosebud
      • Rye
      • Somerville
      • Flinders
      • Baxter
      • Tyabb
      • Dromana
      • Sorrento
      • Tooradin
      • Skye
    • Canberra
      • Aranda
      • Banks
      • Belconnen
      • Bonython
      • Braddon
      • Bruce
      • Calwell
      • Campbell
      • Casey
      • Charnwood
      • Conder
      • Cook
      • Coombs
      • Dickson
      • Duffy
      • Dunlop
      • Fadden
      • Florey
      • Flynn
      • Forde
      • Franklin
      • Fraser
      • Garran
      • Giralang
      • Gordon
      • Gowrie
      • Greenway
      • Gungahlin
      • Hackett
      • Harrison
      • Higgins
      • Holder
      • Holt
      • Isabella Plains
      • Kaleen
      • Kambah
      • Latham
      • Lawson
      • Lyneham
      • MacGregor
      • Macquarie
      • Manuka
      • Mawson
      • McKellar
      • Monash
      • Moncrieff
      • Murrumbateman
      • Ngunnawal
      • Nicholls
      • Page
      • Queanbeyan
      • Red Hill
      • Scullin
      • Spence
      • Tuggeranong
      • Wanniassa
      • Watson
      • Weetangera
      • Weston Creek
      • Woden
      • Yarralumla
    • Ballarat
  • About
    • Meet the team
    • Total Care Membership
    • FAQ
    • Blog
    • Join Our Team
    • Privacy Policy
    • Offer Terms & Conditions
    • Website Terms and Conditions
  • Contact Us

What To Do If Your Rheem Hot Water System Is Not Working

By Richard Foster

rheem hot water system not working

There’s nothing quite like a freezing shower to remind you how much we rely on our hot water systems. If you’re standing there wondering why a Rheem hot water system not working has suddenly become your morning reality, you’re not alone – but you’re not without a few things to try, either.

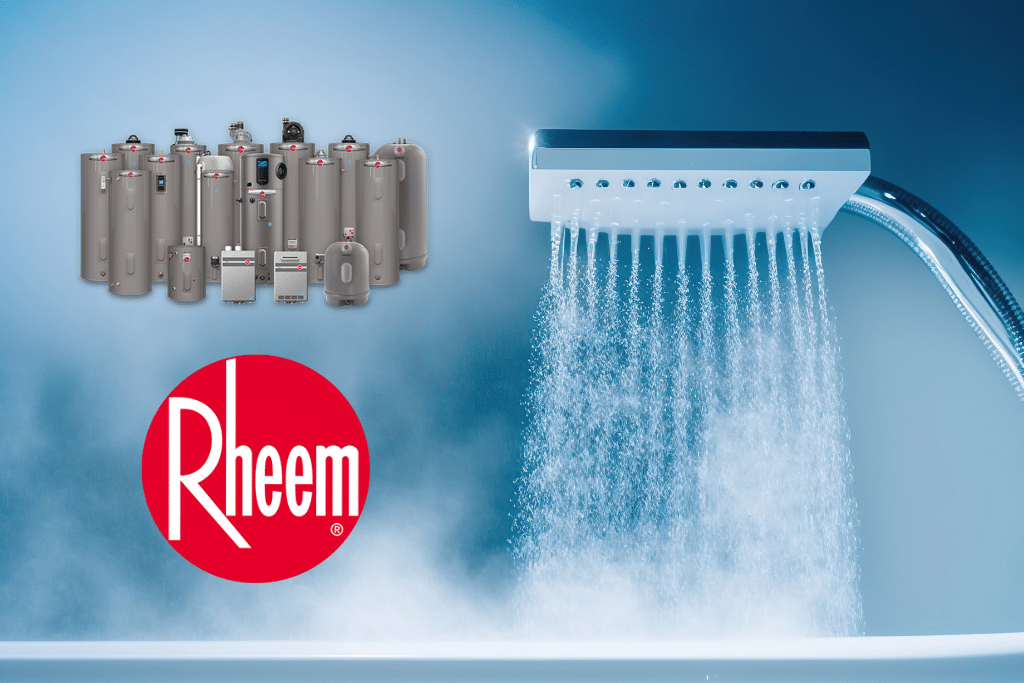
You love reliable hot water – and that’s probably why you installed a Rheem! It’s one of Australia’s most trusted and recognised hot water brands, with decades of proven reliability across gas, electric, solar, and heat pump models. But even the most dependable system can hit a snag – especially if it’s been a few years since installation, or the weather, water pressure, or power supply throws it a curveball.

Our exclusive guide will walk you through common Rheem hot water system troubleshooting steps based on real information from Rheem’s own manuals, fault code references, and our own hands-on service experience. Whether you have a storage tank unit, a continuous flow gas or unit, a heat pump, or a solar-boosted system, we’ve broken it all down so you can get to the bottom of it fast.

Let’s find out what’s going wrong with your Rheem – and what you can do next:

1. Identify your system type

First things first – know your unit. Rheem has several types of water heaters:

  • Continuous flow (gas)
  • Electric storage
  • Gas storage
  • Solar systems (with or without gas/electric booster)
  • Heat pumps
  • Instantaneous (or continuous flow) water heaters.

Every model has its quirks, but they all have one thing in common – if something goes wrong, Rheem tries to make your life easier by starting with a clearly displayed fault code.

So before you panic, check the screen or monitor on your unit or controller. If there’s a number flashing, that’s your clue.

2. Look for an error code

As we’ve just said, if you see a code, that’s good news – because it’s not a guessing game anymore. This little code will help you or your plumber find the fix faster.

A few key examples:

11 = ignition failure

12 = flame failure

14 = overheat

79 = fan motor fault.

These are straight from the Rheem water heater troubleshooting manual, and often indicate specific faults that need checking. For continuous flow models, error codes appear on the controller screen or diagnostic display.

If you’re on LPG and see error 11, for instance, the fix could be as simple as checking the bottle level and restarting the unit.

3. Restart your system

Sometimes, especially for gas models, restarting can fix a minor hiccup. To safely reset your system:

  • Turn off the power at the wall or GPO.
  • Wait 10 seconds.
  • Turn the power back on.
  • Reopen the hot tap.

This can often clear non-critical issues in many Rheem gas hot water system not working scenarios. But if the code comes back right away, it’s time to call in help.

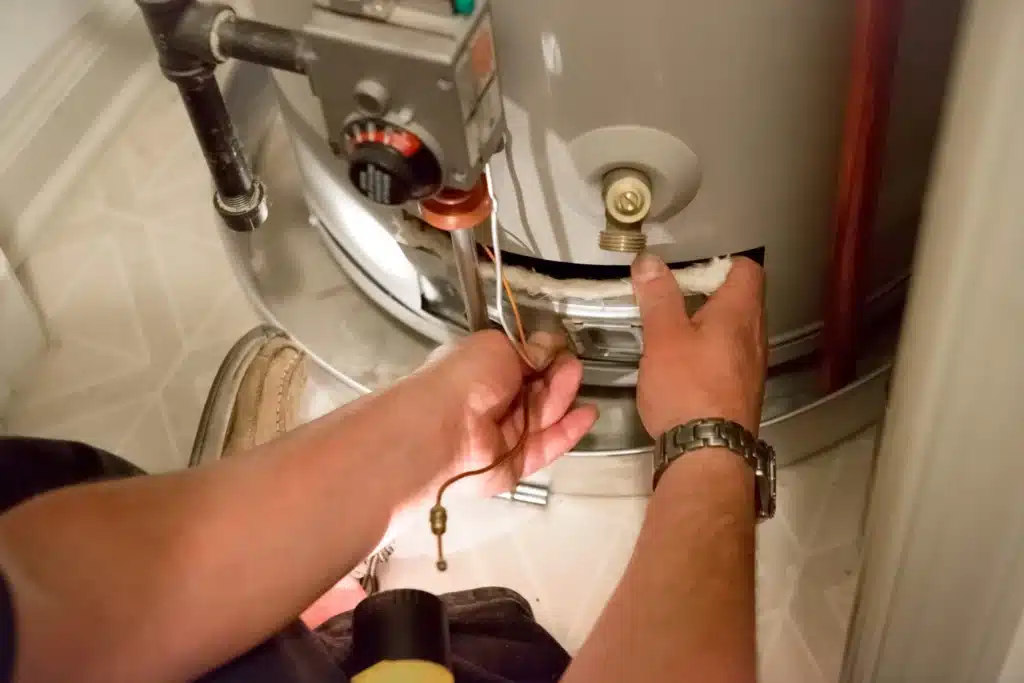
4. Check basic power and gas

If your screen is blank, or there’s no hot water at all:

  • Check the unit is plugged in and switched on.
  • For solar or electric systems, check the circuit breaker.
  • For gas systems, make sure your gas supply hasn’t been interrupted
  • For LPG users, check the bottle and regulator.

These checks rule out a surprising number of calls where the issue wasn’t with the unit itself, but the power or gas supply.

5. Continuous flow/instant unit? Check your flow rate

One of the most common Rheem continuous hot water troubleshooting calls we get is for fluctuating temperature – or no hot water at low flow.

Why? Because continuous flow units require a minimum water flow rate to activate. If you’ve got water-saving taps or showerheads, you may be below that threshold – especially with new installations.

SOLUTION: Open the tap fully.

If that works, you might need to change the aerator or restrictor on your tap.

6. Solar unit? Check the booster and weather

If your particular Rheem solar hot water troubleshooting situation involves lukewarm or cold water, consider the weather. Cloudy days or a string of rainy mornings can reduce solar collection.

Most systems include a booster (gas or electric). Make sure:

  • The booster is switched on
  • The timer (if fitted) is correctly set
  • You’re using enough booster time to meet your daily needs
  • If your booster is on but water is still cold, it may be a failed thermostat, element, or controller.

7. Heat pump? Listen for operation and look for lights

With Rheem heat pump water heater problems, a common issue is a flashing light on the control panel. This could mean anything from defrost mode to a fault with a sensor.

If you don’t hear the fan or compressor running, or the light keeps flashing in a specific pattern, it may need a service call. You’ll find the fault explanation in your specific Rheem owner’s guide.

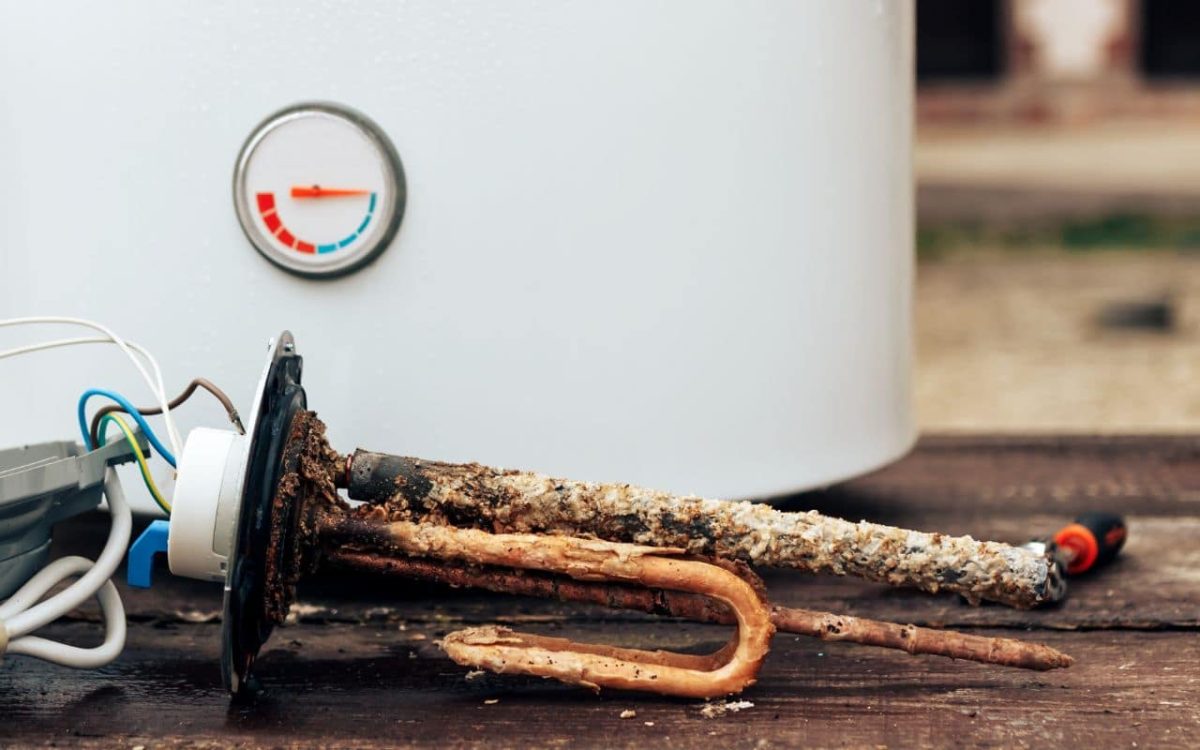
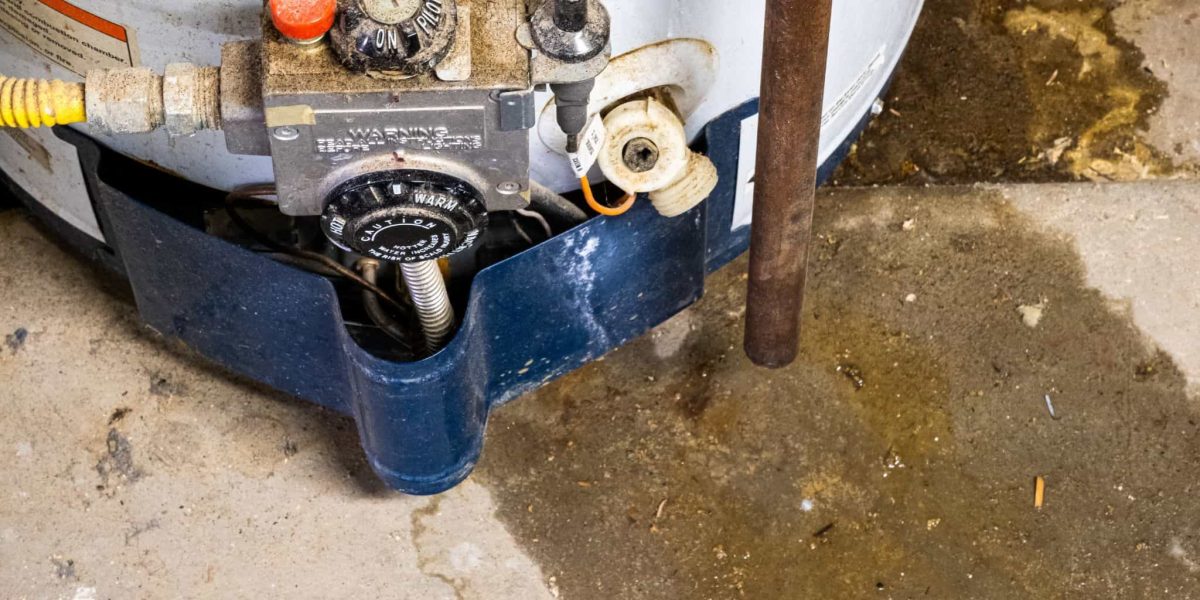
8. Water leaking? take a closer look

Not all leaks mean disaster! For storage tanks, the temperature pressure relief valve (TPR) is designed to release a small amount of water during heating.

But:

  • If it’s more than a bucket a day
  • If it’s leaking constantly
  • If water is leaking from fittings or joints …

Then it’s time to act. We often find that an everyday Rheem hot water not working report turns out to be a slow hot water leak that’s been ignored too long – leading to corrosion or electrical failure.

9. Check the controller or thermostat setting

For Rheem systems with controllers (like the ones installed in kitchens or bathrooms), make sure the temperature isn’t set too low. For storage models, especially electric ones, the thermostat could be faulty or set incorrectly.

Rheem instant hot water not working quite well enough? If you have warm but not satisfyingly hot water, check if a child-safe or extra temperature limiter has been activated.

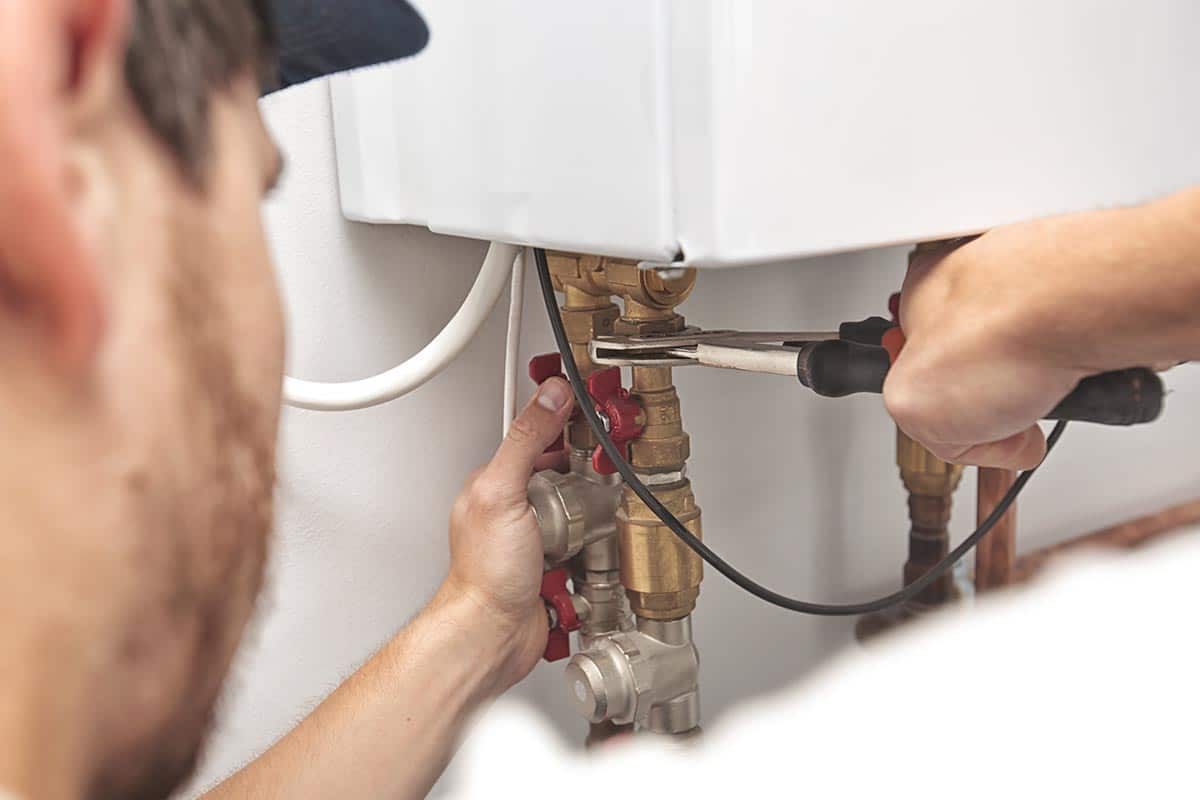
10. Call a Rheem-specialist plumber

Sometimes, the issue will be beyond DIY – and that’s ok.

Checked all the basics and you still have a Rheem hot water heater not working? It’s time for a licensed plumber to inspect the system. Here at Fix-It Right Plumbing, we’ve been analysing fault codes, testing components, and making safe and approved repairs for years. From flow sensors to gas valves to thermistors and beyond, we know our way around all Rheem units.

So, whether you need a hot water replacement in Melbourne, expert hot water repairs in Geelong, or help with hot water systems in Canberra, the friendly team at Fix-It Right Plumbing can be at your door fast with the right equipment and specialist know-how.

Call now for help with your trusty Rheem

They’re great units from a great brand – until you have a Rheem hot water system not working, of course! No one likes to be left in the cold, but a bit of basic troubleshooting can go a long way. Just remember never to push your luck with electrical or gas components, because that’s pretty risky.

Give us a shout for help with your Rheem – we’ll Fix-It Right, the first time.

Sitemap

Filed Under: How to guide

A Complete Guide To Troubleshooting Rinnai Hot Water

By Richard Foster

rinnai hot water system not working

Rinnai hot water system not working? This hot water brand has built a strong reputation in Australia for reliable, efficient hot water solutions – which is probably why you had one installed! From continuous flow units to storage tanks, solar-boosted systems and advanced heat pump technology, a Rinnai hot water system is designed to deliver years of dependable performance.

But even the best systems can hit a snag, and when they do, knowing the right steps can save you time, stress, and cold showers. If your Rinnai hot water system is on the blink, you’ve found the right place – because our exclusive guide will walk you through:

  • The most common Rinnai-specific issues
  • What you can check yourself
  • And when it’s time to call in a Rinnai hot water expert.

1. Start with the basics

Before diving into detailed Rinnai hot water system troubleshooting, let’s rule out the simple issues:

Power supply:

  • For electric or heat pump systems, make sure the circuit breaker hasn’t tripped.
  • For gas units with electronic ignition, confirm the unit is plugged in and switched on.

Gas supply:

If you have a gas system, check that the gas isolation valve is open and your gas supply is active.

Water supply:

Ensure the cold water inlet valve is open. If the system has been drained recently (maintenance or repairs), it will need to be refilled before operation.

Controller settings:

For systems with a digital controller, check that:

  • It’s powered on
  • It’s set to the correct temperature
  • It’s showing no error codes.

2. Continuous flow & instant systems

If you have a Rinnai Infinity, B-series, or something similar, the most common faults are related to ignition, flow rate, and temperature sensing. For example, if you’re dealing with a Rinnai B16 no hot water situation, check that:

  • The water flow is above the minimum activation rate (usually around 2-3 litres per minute).
  • The shower head or tap aerator isn’t blocked, which can reduce flow.
  • Gas isolation valves are open and there’s no interruption to supply.
  • The hot water controller is on and displaying the set temperature.

Rinnai hot water not working still? If it’s in a continuous flow unit, an error code on the display can point to the fault.

Common codes cover:

  • Ignition failure (code 11)
  • Flame loss (code 12)
  • Sensor problems (code 34).

3. Storage tank systems

For those traditional gas or electric storage tanks, problems often relate to thermostats, heating elements, or relief valves.

  • If you notice lukewarm water, it may be due to a faulty thermostat or a failed heating element.
  • On gas storage models, check for a lit pilot flame if your unit uses one, or check ignition status if electronic.
  • If your Rinnai gas hot water not working problem includes signs like no pilot flame, repeated flame-outs, or popping/banging noises, it could indicate a gas control fault or sediment build-up inside the tank.

If in doubt, get a licensed plumber out to inspect and rectify.

4. Solar and solar-boosted systems

Rinnai’s solar hot water models pair roof-mounted collectors with a gas or electric booster. Common Rinnai solar hot water problems include:

  • Insufficient sunlight combined with a disabled booster – switch the booster on in cloudy weather or high-demand periods.
  • Air locks in the solar circuit, which can prevent circulation.
  • Pump or controller faults stopping heated water from moving from the collectors to the tank.

Solar systems also need a periodic service to check glycol levels (if applicable), pumps, and temperature sensors. If these aren’t maintained, efficiency and output can drop sharply.

5. Heat pump units

Heat pump water heaters are efficient – but they rely on airflow and ambient temperatures to operate. Blocked air filters, refrigerant leaks, or faulty fans can all result in poor heating performance.

If the unit is running but water stays cold, the refrigerant circuit or compressor may require professional attention.

6. Instant & portable units

A Rinnai instant hot water not working problem can be as simple as low gas cylinder pressure (for portable camping units) or clogged inlet filters.

Always check water and gas supply first, then clean the inlet filter if possible.

7. Hot water controllers

Modern Rinnai systems often use wall-mounted controllers to set water temperatures. Rinnai hot water controller not working?

Check:

  • It’s switched on and showing a display.
  • The controller cable is plugged in firmly at the unit and controller end.
  • There’s no corrosion or water damage at the controller.

If there’s no display, try resetting the system – you’ll be surprised how often that works!

8. Specific Rinnai issues across the range

Some issues are common only across certain Rinnai models. Rinnai Infinity 26 troubleshooting, for example, very often involves:

  • Checking water flow rates
  • Ensuring sufficient gas pressure
  • And clearing blocked inlet filters.

For a Rinnai B26 not working, ignition failures are the most frequent cause – often linked to gas supply issues or a faulty flame sensor.

9. Resetting your unit

In many cases, a simple reset can clear a temporary fault.

  • On Rinnai storage models, the Rinnai Hotflo reset button is usually located under the access panel near the thermostat.
  • On continuous flow systems, resetting is typically done via the controller – switch off, wait 30 seconds, then restart.

Remember, only reset once, or twice at the max – repeated trips indicate a fault that needs investigation.

10. When to call a professional

While there’s a lot you can check yourself, some problems simply require a licensed plumber or gasfitter.

Call a pro if you notice:

  • Persistent error codes that return after a reset.
  • Leaks from the unit or pipework.
  • Signs of gas leaks (sulphur/rotten egg smell).
  • Water temperature fluctuations that don’t match controller settings.
  • Unusual noises from pumps, fans, or burners.

Why Fix-It Right for your Rinnai repairs?

Rinnai systems are well known for their superb durability – but when they do develop a fault, they deserve expert attention.

Here at Fix-It Right Plumbing, we work on all types of Rinnai hot water systems – gas, electric, solar, instant, storage, and heat pump. Our fully stocked vans and trained team mean we get to the root cause, not just a quick fix. Whether you need hot water servicing in Melbourne, hot water repairs in Geelong, or hot water system help in Canberra, we fix it right the first time – every time!

Need your Rinnai hot water back fast?

Rinnai hot water system not working? Call the friendly crew at Fix-It Right Plumbing today or book online – and get your hot water steaming hot again.

Sitemap

Filed Under: How to guide

DIY Drain Snake Fails (And How To Avoid Them)

By Richard Foster

Drain snake mistakes

We’ve all been faced with a stubborn blockage in a sink or drain from time to time – but you may have been reluctant to learn how to use a drain snake. In fact, you may not even have known what a drain snake is!

A drain snake – also called a drain auger or plumbing snake – is a really handy DIY tool for clearing basic clogs without calling in a professional plumber. It’s inexpensive, easy to use, and widely available in hardware stores. But, like any tool, there’s a right way – and plenty of wrong ways – to use it.

Our guide will quickly walk you through exactly what a drain snake is, how to use one correctly, and then help you avoid the most common pitfalls. Don’t worry – if all else fails, your local plumbers at Fix-It Right can help.

But first, let’s dive in!

First things first – What is a drain snake?

Simply put, a plumbing snake is a slender, flexible cable made of coiled metal – usually steel – with a handle at one end and a corkscrew-like auger at the other. When you notice signs of a blocked drain like slow draining or gurgling, it’s time top whip out the drain snake. You push this cable down into your drain, spin it with the handle, and break up or extract whatever’s blocking your pipes. Simple, right?

Quick guide on how to snake a drain correctly

Before we jump into the common mistakes, here’s a quick refresher on properly using your manual drain snake:

  • Insert the snake’s auger tip into your drain.
  • Rotate the handle clockwise to extend the auger further down.
  • Keep turning until you feel resistance (the clog).
  • Break up or retrieve the clog by twisting gently and pulling the snake back slowly.

That’s the short and easy version of how to use drain snake tools effectively. Now, let’s explore the common mistakes DIY enthusiasts so often make when tackling blocked drains.

7 Common drain snake mistakes to avoid

Before you reach for that drain snake, make sure you’re not setting yourself up for one of these all-too-common DIY mistakes:

1. Using excessive force

One of the biggest mistakes made by beginners figuring out how to use a drain auger is applying too much force. Pushing too hard or forcing the snake can damage your pipes, leading to costly repairs.

Let the auger’s coil do the work, because gentle, consistent pressure is all you need.

2. Incorrectly choosing your drain snake

Don’t forget that drain snakes come in various shapes and sizes. For example, a sink snake is specifically designed for smaller pipes found in kitchen or bathroom sinks, while larger pipes require a sturdier, longer snake.

Choosing the wrong snake, such as a lightweight kinetic drain auger for a heavy blockage, can result in ineffective clog removal or damage to the snake itself.

3. Not cleaning the snake after use

A plumbers snake often retrieves unpleasant materials from drains, including hair, soap scum, and food particles. And too many people forget to clean their snake thoroughly after use.

Not only is this unhygienic, but it also reduces the snake’s effectiveness in the future and could spread bacteria around your home.

4. Skipping protective gear

It’s easy to underestimate how messy using a drain snake can be.

So, always wear rubber gloves and safety glasses when learning those ‘drain auger how to use’ instructions for the first time. It will protect you from harmful bacteria and accidental splashes from drain contents.

5. Not confirming the type of blockage

Some DIY users think a snake solves every clog. However, before learning how to use drain cleaner tools like snakes, confirm what’s blocking your drain.

Snakes work best for solid blockages (like hair or soap scum). If your blockage involves grease build-up, chemical solutions might be required first, or you might need professional help.

6. Forcing past pipe bends

Plumbing pipes contain several bends to regulate water flow. When learning how to use coiled drain and sink cleaner tools, never force the snake through bends.

If you encounter resistance at bends, slowly retract the snake slightly and rotate gently until it naturally moves through.

7. Rushing the process

Patience is crucial when using a drain auger. People frequently become frustrated if they don’t immediately reach the clog and start twisting aggressively.

Instead, slowly feed the snake through the pipe, carefully feeling for obstructions. Slow, steady progress always yields better results than rushed attempts.

When DIY isn’t enough – How pros handle tough clogs

It’s important to realise that drain snakes sold for DIY use differ significantly from professional plumbing tools. Professional plumbers use powered plumbing snakes – confusingly also known as plumber snakes – which are often powerfully motorised and capable of handling serious clogs far beyond standard DIY versions.

Professional tools include:

Motorised Drain Snakes: These heavy-duty snakes quickly cut through tough blockages, roots, and hardened debris.

High-Pressure Water Jetters: A powerful alternative that blasts water to clear blockages completely, leaving pipes spotless.

Advanced CCTV Cameras: Used to visually inspect the inside of your pipes, identifying precisely what’s causing your blockage.

When facing persistent clogs, professional plumbers not only remove the blockage but also diagnose underlying issues in your plumbing system. This proactive approach can save you considerable trouble and money in the long run.

When to call Fix-It Right Plumbing

While knowing how to use drain snake tools can help solve simple plumbing issues, some clogs are beyond any and all DIY methods. Repeated blockages, stubborn drains, or signs of severe plumbing problems require professional intervention, and Fix-It Right Plumbing is here to help!

Whether you’re looking for Melbourne blocked drain plumbers, Geelong drain cleaning experts, or Canberra drainage specialists, our friendly team of expert plumbers is equipped with state-of-the-art technology to handle even the toughest clogs effectively and efficiently. We:

  • Assess your plumbing thoroughly
  • Clear blockages safely
  • And offer solutions to prevent future issues.

Don’t let your plumbing problem worsen – contact the professionals to get it done right the first time. If you’re ready for reliable and professional plumbing help, call Fix-It Right Plumbing today to experience hassle-free plumbing solutions you can trust.

Sitemap

Filed Under: Blocked Drains, How to guide

7 Signs Your Hot Water Anode Might Need Replacing

By Richard Foster

rust in hot water anode

How much do you know about your hot water anode? If the answer is “almost nothing,” don’t feel bad, because most homeowners are in the same boat as you. But this small, inexpensive, hidden part inside your hot water system could be the key to preventing rust, smells, leaks – even premature tank failure.

It’s one of those things you don’t realise matters … until it does. And it’s too late.

In our guide, we’ll walk you through what an anode does, why it matters for your system’s health, and the warning signs that yours may need checking or replacing. Whether you’ve got an old electric unit or a newer gas model, these signs apply to almost every storage tank system out there.

So, what is an anode, anyway?

And what does an anode do? Every storage-style hot water system has a metal rod inside it – usually magnesium or aluminium – that’s designed to attract corrosion away from the steel tank. It’s called a sacrificial anode, because it literally sacrifices itself so your tank stays protected.

When the anode is in good condition, your tank stays clean inside. But when the rod is fully corroded, rust starts eating away at the tank walls – and you won’t know until the damage is done.

So how do you know yours may need a cheap replacement?:

1. Your hot water smells like metal or rotten eggs

Unpleasant smells are one of the most common early warning signs.

That rotten egg smell (especially in rarely used taps or showers) is often caused by bacteria reacting with the magnesium rod inside your tank.

It’s not dangerous – but it’s a sign the anode might be breaking down. A smelly tank doesn’t always need replacing – but you could be just a few steps shy of a failed system. So a check by a licensed plumber to make sure the problem isn’t corrosion or bacteria build-up is probably a very good idea.

2. Water has a rusty or brown tint

If your hot water has started to look brown or rusty, especially first thing in the morning, this could point to an aging anode hot water system.

The discolouration usually comes from sediment or early-stage corrosion forming inside the tank. When caught early, an anode rod replacement can fix the issue and extend the life of your system.

Wait too long, though, and you might need a whole new tank.

3. You hear rumbling or popping noises

Strange sounds from your tank (like rumbling, banging or popping) are usually caused by sediment buildup on the bottom of the tank – which is often a sign the sacrificial anode hot water system component has broken down and isn’t doing its job anymore.

This can lead to overheating, inefficiency, and stress on the internal components.

4. Your system is more than 5 years old

Even if everything seems fine, a system that’s over five years old should have its hot water system anode checked as part of routine servicing. Some systems will last longer – but many Australian tanks begin to degrade internally around the 5-7 year mark if the anode hasn’t been touched.

Here at Fix-It Right Plumbing, we include anode for hot water system inspection in our standard system servicing across Melbourne, Geelong, Canberra and beyond.

5. You’re going through heaters more often than you should

If you’ve had to replace your hot water tank sooner than expected, it’s worth checking whether the anodes for hot water systems were ever serviced. Often, a perfectly good tank is lost to rust simply because the anode was never inspected – or replaced.

Regular checks could save you thousands over time.

6. There’s water pooling at the top of the tank

Hot water heater leaking from top anode? In other words, do you see water around the top of your system? It could be a valve issue … or it could be a failing anode. Specifically, the thread or seal where the rod is inserted may be compromised, allowing water to seep.

If left unchecked, this slow leak can turn into full-blown rust damage. Our plumbers can assess whether it’s time for a sacrificial anode water heater replacement or just a simple tightening or reseal.

7. You’ve never heard of an anode before now

If this blog is your first intro to the concept of hot water system anode replacement, there’s a good chance yours has never been checked. And if your system is more than a few years old, that could mean trouble down the track.

Replacing an anode is much cheaper than replacing an entire tank – and if your tank is still in good shape, we can often put a new rod in place in under an hour.

What happens during a hot water anode replacement?

Here’s how we handle it at Fix-It Right Plumbing:

  • We isolate the system and relieve pressure.
  • The old hot water tank anode is removed (sometimes with a bit of effort if it’s corroded solid).
  • We inspect the condition of the rod and internal tank.
  • If appropriate, we install a new HWS anode (aluminium or magnesium depending on system type and water quality).
  • The tank is resealed and tested.

It’s clean, fast, and gives you peace of mind that your system isn’t quietly rusting from the inside out.

How often should you replace the anode?

Generally every 3 to 5 years – but it depends on:

  • The quality of your water (hard water means faster corrosion)
  • The tank size and hot water brand
  • Whether your system is under heavy demand

We recommend having the anode inspected every 2-3 years once your system passes the 5-year mark – especially if it’s in daily use by a family.

A cheap & tiny part that saves big money

Don’t wait for your tank to fail before looking into your anode. Like all good maintenance, it’s the simple stuff that protects you from major costs later on.

At Fix-It Right Plumbing, our friendly team is always just here to help with quick, honest advice on anode servicing and system health – whether your tank is brand new or 10 years old and making weird noises.

Book your anode check today

Think your system might be due? Call Fix-It Right Plumbing and ask about our hot water anode inspections and replacements. We offer professional hot water servicing in Melbourne, including full system checks and anode replacements, reliable hot water inspections in Geelong, and expert hot water system maintenance in Canberra. You’ll get honest advice – no pressure, no upselling – just the peace of mind that your system is being properly looked after.

Give us a call or book online now.

Sitemap

Filed Under: How to guide

10 Steps To Troubleshoot Your Instant Gas Hot Water System

By Richard Foster

instant gas hot water not working properly

Trying to cope with instant gas hot water not working as it should? Life could get worse than cold showers and icy dishes, but it’s still a major inconvenience disrupting everything from cooking to laundry and beyond – so you need to get it sorted out ASAP.

Instantaneous gas hot water systems, also known as tankless or continuous flow units, are prized for their sleek, space-saving look and a reputation for endless hot water and energy efficiency. But even these nifty and usually very reliable systems can hit a snag now and then. So before you resort to boiling the kettle or calling for help, work through these 10 steps that we’ve tailored just for you.

It’s your friendly guide to instantaneous gas hot water system troubleshooting, helping you pinpoint the issue – or know when to call Fix-It Right Plumbing.

Your instant gas hot water troubleshooting checklist

As you no doubt already know, instantaneous gas systems heat water on demand using a gas burner, making them distinct from storage tanks. Whether your unit is a compact wall-mounted model or a high-capacity system for a large family, these universal checks will help you figure out why you have an instant gas hot water system not working right anymore. Let’s get started:

1. Confirm the gas supply

First, is your gas supply still active? Gas instant hot water not working is frustrating, but it might be fixed in just seconds!

Check that your gas meter valve is open and other gas appliances (like your stove) are still functioning. A closed valve or supply interruption (common during maintenance or billing issues) can halt the heating. For LPG users, verify your tank isn’t empty.

THE VERDICT: A disrupted gas supply is a frequent cause of system failure.

2. Check the power supply

Many instantaneous systems require electricity for ignition or controls, even though they’re gas-powered.

So head to your meter box/electrical panel and look for a tripped breaker or blown fuse. If your instant gas water heater troubleshooting stops at Step 2 and reveals a power issue, simply reset the breaker. If it trips again, you may have an electrical fault, which needs professional attention.

THE VERDICT: A power cut could explain why your system isn’t firing up.

3. Inspect the pilot light or ignition

Older instantaneous units rely on an instant gas hot water system pilot light, while newer models use electronic ignition.

If yours has a pilot light and it’s out, relighting it might solve the problem – just check your particular system’s manual for instructions.

For electronic ignition, a failure to spark could mean a faulty igniter. If your gas hot water system keeps turning off, especially after ignition, this is a likely culprit.

THE VERDICT: Relighting or testing ignition systems is tricky and best left to pros due to gas safety risks.

4. Assess water flow & pressure

Instantaneous systems need sufficient water flow to activate the burner – usually 2-3 litres per minute.

If your instantaneous hot water goes cold, low hot water pressure could be to blame. Check if taps or showerheads are clogged with debris or limescale – common in many parts of Australia due to hard water. Test the flow by opening multiple hot taps.

THE VERDICT: If pressure’s low across the house, a blocked inlet filter or pipe issue might need professional cleaning.

5. Look for temperature fluctuations

If your gas hot water goes hot then cold, the system is clearly struggling to maintain consistent heating.

This can happen if the burner is underperforming, often due to gas pressure issues or a faulty temperature sensor. Check the unit’s temperature setting if you can – usually 50°C for Australian standards.

THE VERDICT: If it’s cycling between hot and cold, the heat exchanger might be clogged or the gas valve faulty, requiring expert diagnosis.

6. Check for error codes or indicators

Modern instantaneous units often have digital displays or indicator lights.

If your gas instant hot water system keeps turning off, look for error codes or flashing lights. Codes might indicate issues like ignition failure, overheating, sensor faults, or something else entirely. Consult your system’s manual (or Google the model) to decode these signals.

THE VERDICT: This step is crucial for instant gas water heater troubleshooting, as it pinpoints specific problems without guesswork.

7. Inspect for leaks or corrosion

A hot water leak can disrupt your system’s performance, making it seem like you have an instant gas hot water system not working at all. Check around the unit for water puddles, damp spots, or corrosion, especially on the heat exchanger or connecting pipes. A faulty pressure relief valve can also cause pressure drops, mimicking a system failure.

THE VERDICT: If you spot a leak, turn off the water and gas supply immediately and call a plumber to prevent damage.

8. Evaluate ventilation & flue condition

Instantaneous gas systems require proper ventilation to burn gas safely.

A blocked flue or poor ventilation can cause the unit to shut down as a safety measure. Check the flue (usually a pipe exiting the unit) for:

  • Debris
  • Bird nests
  • Corrosion.

In our dustier or leafier suburbs, blockages are really common.

THE VERDICT: Never attempt to clear a flue yourself – gas systems are hazardous, and this is a job for professionals.

9. Consider system age & maintenance

Most instantaneous gas systems last 10-15 years with regular maintenance. If your unit’s nearing this age, components like the heat exchanger or gas valve may be wearing out, leading to issues – and a gas instant hot water not working. Lack of servicing, such as cleaning the burner or descaling the heat exchanger, can seriously reduce efficiency.

THE VERDICT: If your system’s old or neglected, replacement might be more cost-effective than repairs.

10. Know when to call a professional

Have you worked through this checklist and still have no hot water? It’s time to call in the experts.

Complex issues like faulty igniters, gas valve problems, or heat exchanger blockages require fully-licensed plumbers to ensure safety and compliance with Australian regulations.

THE VERDICT: Knowing when to stop DIY attempts is key to safe, effective and legal repairs.

Fix-It Right Plumbing: Your instant hot water experts

When your instantaneous gas hot water system lets you down, Fix-It Right Plumbing is here to bring your mood back up! Our friendly team of Canberra hot water , Melbourne hot water, and Geelong hot water plumbers specialise in diagnosing and fixing gas hot water issues, from quick repairs to full system replacements. We’ll get to the root of the problem, ensuring your home has reliable hot water again – fast.

Don’t let a faulty system get you down – contact Fix-It Right Plumbing today for expert and affordable service you can trust.

Sitemap

Filed Under: gas, How to guide

A 10-Point Checklist To Troubleshoot Electric Hot Water

By Richard Foster

electric hot water system not working

Nothing ruins a winter morning in Australia like stepping into a freezing shower – you expected a warm hug, and instead you got an icy slap! An electric hot water system not working leaves you shivering, making it extremely tempting to either totally panic or call for professional help right away. But before freaking out, try reading on for a few minutes:

What have you got?:

  • A storage tank
  • An instant hot water unit?
  • A heat pump?
  • A solar system with an electric booster?

No matter which one, most issues boil down to a few common culprits. So before you resign yourself to cold dishes or pricey repairs, grab a coffee and work through this 10-point checklist designed for Australian homeowners. It’s your helpful guide to electric hot water system troubleshooting, helping you pinpoint why your system’s on the blink – or when to call Fix-It Right Plumbing to save the day!

The homeowner’s hot water checklist

No matter if your system is a bulky tank in the garage, a sleek instant unit under the sink, a humming heat pump, or a solar setup soaking up Aussie sun, these universal checks will help you figure out why there’s no electric hot water coming out of that tap. Let’s dive in:

1. Verify the power supply

First up, is the power even reaching your system?

A broken hot water system often starts with a tripped circuit breaker or blown fuse. Check your electrical panel or meter box – look for a breaker labelled for your hot water system and reset it if it’s off.

Storage tanks, instantaneous units, heat pumps, and solar boosters all need steady electricity. If the breaker trips again, you might have an electrical fault, so don’t keep flipping it. This is a key step in how to check hot water system basics before moving on.

2. Check the main power switch

Some electric systems have a dedicated on/off switch near the unit or on a nearby wall. If you have an electric hot water not working as it should, ensure this switch is on.

For solar systems, the electric booster might have its own switch – and it’s often overlooked. A flicked-off switch could be the simple explanation for an electric water heater not working – so double-check before you stress!

3. Inspect the thermostat settings

If the power’s fine but you’re still wondering what to do with an electric hot water system not heating water, the thermostat might be the issue.

All electric systems – tanks, continuous flow units, heat pumps, and solar boosters – use thermostats to control water temperature, typically set to 50-60°C for Australian safety standards.

Check the dial if it’s got one (on tanks) or the digital display (on instant or heat pump units). If it’s set too low, nudge it up. A faulty thermostat might not signal the heater to kick in, so note this for potential electric hot water system repair.

4. Test for overload or demand issues

Is your household simply maxing out your system?

If multiple showers, a dishwasher, and laundry are all running at once, a storage tank might run dry, leaving you with no hot water. Instant systems can struggle if undersized, and heat pumps or solar boosters may lag during peak use or cloudy days.

If overuse is the problem, you might need a larger unit to learn how to fix hot water system demands long-term.

5. Look for visible leaks

A leak can make any electric system act like it’s broken.

Check around your tank, instant unit, heat pump, or solar booster for:

  • Puddles
  • Damp spots
  • Rusty patches.

A faulty pressure relief valve, common across most systems, can cause pressure drops that mimic a broken hot water system. If you spot a hot water leak, turn off the water and power supply immediately to avoid damage and call a pro.

6. Check for strange noises or smells

What are you hearing?:

  • Unusual buzzing?
  • Hissing?
  • Burning/sizzling smells?

They all spell serious trouble. Storage tanks might rumble from sediment build-up, instant units could hum from clogged coils, and heat pumps may whine if the compressor is struggling. Solar boosters can also make noises if the wiring is loose.

These signs often point to components needing repair, so note them during your checks.

7. Assess the system’s age

How old is your system?:

  • Storage tanks typically last 8-12 years
  • Instant units and heat pumps 10-15
  • And solar systems will live for up to 15 with proper maintenance.

An ageing system is prone to issues like corrosion or worn-out elements, leading to no electric hot water. If your unit is nearing the end of its life, replacement might be smarter and cheaper than repeated fixes.

8. Evaluate water quality issues

Hard water, common across our country, can clog systems with sediment:

  • In storage tanks, build-up insulates heating elements.
  • In instant units, it blocks coils.
  • In heat pumps, it affects efficiency.
  • And in solar systems, it can clog booster pipes.

If your water’s cloudy or rusty, sediment might be why your system is not heating. Flushing or cleaning is often needed, but it’s a job for professionals either way.

9. Check for error codes or indicators

Modern instant units, heat pumps, and some solar systems have digital displays or indicator lights.

If you have an electric hot water system not working right, look for error codes or flashing lights. These can point to specific issues, like a failed sensor or compressor fault. Check your system’s manual for code meanings, but never attempt electrical fixes yourself.

10. Know when to call a plumber

If you’ve checked everything and still have no hot water, it’s time for professional help. Faulty heating elements, compressors, or wiring issues require fully-licensed expertise to ensure safety and compliance with Australian standards. Knowing how to fix hot water system problems sometimes means recognising when DIY isn’t enough. A plumber can diagnose and handle electric hot water system repair efficiently.

Fix-It Right Plumbing to the rescue!

Electric hot water system letting you down? Fix-It Right Plumbing has your back for:

  • Melbourne electric hot water repair
  • Geelong electric hot water repair
  • Canberra electric hot water repair

Our friendly team specialises in fixing and replacing all electric hot water systems – tanks, instant units, heat pumps, and solar setups. We’ll get to the root of the problem, whether it’s a quick thermostat tweak or a full system overhaul, ensuring your showers are hot again in no time. Don’t let a cold morning ruin your day – call Fix-It Right Plumbing today for expert, reliable service and advice!

Sitemap

Filed Under: How to guide

Who Is Responsible For Stormwater Drains In Victoria?

By Richard Foster

Who is responsible for stormwater drains Victoria

Have you spotted a pool of water in your yard after heavy rain? Maybe you’ve seen the wet stuff gushing from a blocked drain near your driveway. No matter what’s led you right here, it’s perfectly natural to wonder – who is responsible for storm water drains? Do you need to fix it, or is it the council’s problem? Let’s dive in.

In Victoria, as is basically the case in the rest of Australia, stormwater drainage responsibility is split between homeowners, local councils, and water authorities. But where does your responsibility begin and end? Knowing this helps you avoid unnecessary stress, unexpected costs – even potential legal issues!

In our guide, we’re going to break down:

  • Exactly what you’re responsible for as a homeowner
  • What’s handled by the local council or Melbourne Water and Barwon Water
  • And answer ‘How do I find stormwater pipes on my property VIC wide’ if you have no idea where to even begin!

Stormwater Melbourne and Geelong: Understand your responsibilities

Managing your stormwater is absolutely critical for preventing flooding, erosion, and property damage – particularly in Victoria! Our notoriously heavy downpours can overwhelm drainage systems in a flash. But understand this as well: Not all stormwater drains are your responsibility. Some responsibility belongs to the council, some to Melbourne Water or Barwon Water, and some to private developments.

So how on earth do you figure out what’s yours to deal with? Let’s break it all down step by step:

1. Start by identifying where the problem is

The first step in determining responsibility is locating where the drainage issue is occurring.

Is the issue on your property?: It’s most likely your responsibility. This includes gutters, downpipes, drains, and pipes that direct water away from your house.

Is the problem outside your property boundary?: It may fall under the responsibility of your local council or Melbourne Water and Barwon Water.

As a general rule of thumb, if the drain is within your property, it’s your responsibility. If it’s under a public road, a footpath, or a park, it’s the council’s responsibility.

2. How to find stormwater pipes on your property

Do you suspect a blockage, a leak, or overflow? You’ll need to locate your stormwater pipes before taking any further action. But how?:

Check your property plans: Your property’s drainage layout should be in the documents you received when buying or building your home.

Ask your local council: Councils keep drainage plans and can provide information about approved stormwater discharge points.

Use a pipe locator service: Some professional plumbers (like Fix-It Right Plumbing!) use advanced tools to locate stormwater pipes underground.

If your property lacks clear drainage plans, getting a professional to map out your stormwater plumbing can help prevent future flooding issues.

3. Who is responsible for stormwater drains on public land?

Once stormwater leaves your property, it flows into public drainage systems – and they’re managed by the local council or Melbourne Water and Barwon Water.

  • Local councils manage public drains and pits under roads, parks, and footpaths.
  • Melbourne Water and Barwon Water oversee major drainage networks and flood prevention infrastructure.

If you notice a blocked or overflowing drain on a street or public land, contact your local council – don’t try to fix it yourself!

4. Your responsibilities as a property owner

If your home’s stormwater system is blocked or not working properly, let us reiterate – You, yes you, are responsible for fixing it!

Your responsibilities include:

  • Maintaining gutters and downpipes, by regularly clearing leaves, dirt, and debris to prevent blockages.
  • Ensuring legal discharge of stormwater, because your property’s drainage must connect to a legal stormwater outlet, such as the council stormwater system.
  • Fixing damaged or blocked private drains, remembering that if a drain on your property is blocked, cracked, or collapsed, you need to arrange those repairs by yourself.

EXTRA TIP: If stormwater from your home is flooding a neighbour’s property, you may be legally liable for damages if your drainage system is faulty.

5. Understanding stormwater runoff regulations in Victoria

Did you know that redirecting stormwater incorrectly can get you into quite big trouble?

Victoria has super-strict stormwater runoff regulations that prevent homeowners from illegally discharging stormwater onto neighbouring properties or into natural waterways.

The stormwater runoff regulations VIC-wide force you to ensure that:

  • Your stormwater does not flow onto neighbouring properties (this can lead to disputes or fines).
  • All stormwater is directed into a legal point of discharge, as approved by the council.
  • Any alterations to your drainage system comply with council and plumbing regulations.

EXTRA TIP: Before making major changes to your stormwater drainage, check in with your local council to ensure compliance with often very strict stormwater laws.

6. Where does stormwater go after it leaves your property?

Have you ever wondered where stormwater goes once it leaves your property? Well, in Victoria, stormwater follows these paths:

  • From your roof and driveway into underground stormwater pipes.
  • Into council stormwater drains under roads or parks.
  • Flowing into larger Melbourne Water or Barwon Water-managed drainage systems.
  • Eventually discharging into rivers, creeks, or the ocean.

Proper stormwater drainage ensures water does not cause flooding, erosion, or environmental damage – which is why managing it correctly is so very important.

7. When to call a plumber for stormwater issues

Are you dealing with any of these problems at your place? The time may have come to call a professional Melbourne plumber or a Geelong plumbing specialist – like the friendly team right here at Fix-It Right Plumbing!

What are you dealing with?:

  • Blocked stormwater drains: Water pooling in your yard or near drains? You may have a blockage.
  • Flooding/erosion around your property: Poor stormwater drainage can cause major structural issues.
  • Water backing up inside your home: This could indicate a serious stormwater plumbing failure.
  • Unclear stormwater discharge points: If you’re unsure where your stormwater drains are, a plumber can easily help to locate and assess your system.

Get expert help for all your stormwater issues

Sure, understanding who is responsible for stormwater drains can clear up some of your confusion – remembering that these issues on your property are 100% your responsibility, which is a big deal.

But for expert help with:

  • Blocked or damaged stormwater drains
  • Stormwater pipe mapping & inspections
  • And ensuring legal discharge compliance.

Get in touch with Fix-It Right Plumbing ASAP if you need a Melbourne blocked drain plumber or a Geelong drainage specialist. Rest assured: We’ll find the problem, fix it quickly and affordably, and ensure your drainage system works properly for years and years to come.

Call us now for fast, expert, affordable stormwater plumbing solutions!

Sitemap

Filed Under: Blocked Drains, Educational Blog, How to guide

How To Stop Water Hammer In 5 Easy Ways

By Richard Foster

How to stop water hammer
Did you just turn a tap on or off and you’re hearing loud banging, knocking, thudding sounds coming from your plumbing pipes? Maybe it was an appliance, like your washing machine or dishwasher that makes this alarming racket. Just want to know how to stop water hammer right now?

But what is water hammer? It’s what us plumbers call the sudden shockwave in your plumbing system that – yes – can be extremely worrying. But if you don’t deal with it quite quickly, it can cause long-term damage to your pipes and fittings:

  • What exactly is water hammer?
  • Why does it happen?
  • Most importantly, learn how to fix water hammer.

Let’s break this down:

What is water hammer?

Water hammer, also known as hydraulic shock, happens when fast-moving water suddenly hits a closed valve in your pipes. It causes a pressure surge, which results in the loud hammering pipes sound you’re hearing.

Over time, repeated pressure spikes can loosen pipe joints, damage valves, and even lead to burst pipes. It certainly sounds like a proper water hammer fix is absolutely essential for protecting your home’s plumbing – and getting rid of your headache!

What causes water hammer?

There are a few basic reasons why you might be experiencing water hammer in pipes at your place:

Quickly closing taps or valves: When a tap or appliance shuts off too fast, the sudden stop in water flow causes a shockwave.

High water pressure: Excessive pressure in your plumbing system makes water hammer more likely.

Lack of air chambers or water hammer arrestors: These built-in devices absorb pressure surges, but if they’re missing or faulty, water hammer becomes a problem.

Loose pipes: If your pipes aren’t properly secured, they can move and amplify the hammering effect.

How to stop water hammer: The step-by-step fixes

Starting to get your head around the causes? Let’s go through how to fix water hammer – starting with the easiest solutions and working up to more involved fixes:

1. Check & reduce your water pressure

Still wondering how to get rid of water hammer? Well, this is the easiest fix!

But wait – do you know how to adjust your home’s water pressure? Remember, super-high water pressure increases the impact of hydraulic shock, making hammering sounds more intense. But wait a second – is this really easy to do? Let’s explore:

  • Check your home’s water pressure using a pressure gauge (you can find these at hardware stores).
  • If it’s above 500 kPa, install a pressure-reducing valve (PRV) to bring it down to a safer level.
  • If your home already has a PRV, it may need adjusting or replacing.

Lowering the pressure reduces the intensity of the shockwaves that cause water pipe hammering.

2. Secure loose pipes to prevent vibration

The problem might also be caused by loose plumbing pipes. All that rattling and shaking can easily trigger water hammer.

  • Check under sinks, in basements, and behind walls (if accessible) for loose pipes.
  • Use pipe brackets, clips, or foam padding to secure pipes to walls and floors.
  • Ensure hot water pipes have room to expand so they don’t knock against walls when heating up.

Eliminating all this pipe movement helps to absorb the energy that would otherwise produce the hammer tap phenomenon.

3. Drain & refill your plumbing system

Older plumbing systems often have built-in air chambers that help absorb sudden changes in water pressure. But over enough time, the chambers will fill with water – making their function not work in the way you expect it to.

  • Turn off your home’s main water supply.
  • Open all taps, showers, and hoses from the highest to the lowest point in your home to drain the system completely.
  • Once fully drained, turn the water supply back on slowly, allowing air to refill the chambers.

These air chambers act like shock absorbers, preventing water hammer in pipes from causing loud banging noises.

4. Install a water hammer arrestor

Like #1, this is one of the most effective fixes of all. So if nothing else has worked so far, installing a water hammer arrestor should definitely be your next move to get rid of water hammer – forever!

  • Buy a water hammer arrestor from a plumbing or hardware store.
  • Install it near problem areas, such as under sinks, behind washing machines, or near dishwashers.
  • Some arrestors can be screwed directly onto existing pipe fittings, while others may need a plumber to install them.

Your water hammer arrestor will contain a shock-absorbing chamber, absorbing excess pressure while preventing those galling pipe hammer sounds.

5. Replace fast-closing valves

Some appliances, like washing machines and dishwashers, have solenoid valves that close instantly – that can create a water hammer effect if everything isn’t working perfectly.

  • If your washing machine or dishwasher is the culprit, consider installing slow-closing valves or adding a water hammer arrestor nearby.
  • For taps that close quickly, swap them for gradual-closing mixer taps to prevent sudden pressure surges.

Slower-closing valves will reduce the shockwave effect, stopping those water pipes banging sounds.

Know when to call a professional plumber

If you’ve tried all these water hammer fixes and you’re still hearing those loud banging sounds, it’s time to call in the experts. Melbourne plumbers, Canberra plumbing experts, and plumbers in Geelong all recommend getting a professional inspection if your water hammer issues persist. They can:

  • Assess your plumbing system for pressure issues, faulty valves, or missing air chambers.
  • Install water hammer arrestors in the best locations for long-term results.
  • Replace old, damaged, or undersised pipes that could be making the problem worse.
  • Check for hidden leaks or weak pipe joints that might be contributing to water hammer – and much, much more.

Be aware: water hammer can cause serious, expensive, potentially devastating damage to your home and investment over time – leading to leaks, burst pipes, or much more expensive plumbing repairs.

Ready to stop water hammer for good?

Nobody wants to deal with hammering pipes and loud water pipe hammering every time they turn a tap on or off. Do you agree? Well, fortunately, there are plenty of effective ways to stop water pipes banging. But if the problem hasn’t gone away, Fix-It Right Plumbing is right here! Our friendly team will carry out a professional assessment and get that job done quickly, permanently, and affordably.

Reach out to Fix-It Right Plumbing today for expert solutions to stop water hammer in its tracks – before it smashes your plumbing to smithereens! How to stop water pipes banging? Just give us a call or send us a message, right now.

Sitemap

Filed Under: How to guide

6 Ways To Find Stormwater Pipes On Your Property

By Richard Foster

how do i find stormwater pipes on my property
Have you just come in from staring at your yard, scratching your head, and wondering – How do I find stormwater pipes on my property? First up: you’re not alone. Stormwater drainage systems are absolutely essential for managing rainwater runoff – but quite often, they’re not easy to spot!

The good news? Finding them is often easier than you think. Start by looking for the most obvious signs, like:

  • Drainage grates
  • Downpipe connections
  • Areas where water pools during heavy rain.

They’re all telltale indicators of where your stormwater system might be located. But if you can’t find your stormwater pipes, it’s not because you’re missing something obvious or because you’re just ‘bad at this’. Most people aren’t experts in stormwater systems – because they’re busy being experts in other things, whilst being extra-busy with the million other things we need to do!

Plus, sometimes stormwater pipes are buried deep underground or hidden in ways that make them nearly impossible to spot with just a quick glance. Struggling? Don’t stress. We can figure this out – together.

We’re going to walk you through an easy, step-by-step guide to help you locate your stormwater pipes—even if you’re starting from scratch. Whether you’re in Melbourne, Canberra, or Geelong, this guide will give you the confidence to find your drainage system. And if all else fails, we can quickly send out a plumber near you to help get the job done right.

Let’s dive in:

Step 1: Visible signs of a stormwater drain on my property?

The first step in figuring out how to find stormwater drains on your property is to look for visible clues. So let’s start by walking around your yard and checking for:

Drainage grates or pits: These are usually metal drain grates that allow water to flow into the stormwater system or concrete stormwater pit covers that are easy to spot unless covered with dirt and debris.

Downpipes: These are the pipes that run from your gutters down to the ground. Follow them to see where they lead – it’s often where they connect to the stormwater system.

Pooling water: After heavy rain, take note of where water collects. This could indicate a blocked or poorly functioning stormwater drain.

If you spot any of these, you’re on the right track. But if not, don’t stress – there are plenty of other ways to locate your stormwater system.

Step 2: Check your property’s stormwater plans

Still unsure how to locate stormwater pipes? Your next step should be to check your property’s stormwater plans. They are detailed diagrams that show the layout of your stormwater system – including the location of pipes, drains, and other components.

Here’s how to find stormwater plans for your house:

Contact your local council: Many councils keep records of stormwater drainage systems for properties in their area. You may need to submit a formal request or pay a small fee to access these documents. While they may not have much detail for your backyard, they should have some detail on discharge points and pipes along your boundary where the stormwater drain responsibility changes over.

Check the stormwater plans for my house: If you already have a copy of your house’s original building plans, they may include details about the stormwater system.

Ask your builder or plumber: If your home was recently built or renovated, the builder or plumber who worked on it might have a copy of the stormwater plans.

Having the plans upfront can make it a lot easier in your quest to understand how to find out where pipes are on your property.

Step 3: Use a metal detector/pipe locator

Want to scale your search up a bit? Some stormwater pipes are made of metal, so a metal detector can be a handy tool for locating them. Simply sweep the detector over your yard and listen for signals that indicate the presence of metal pipes.

But let’s be honest – most of our stormwater pipes are not metal! For these PVC pipes, you might need a more specialised tool, like a pipe locator. These devices use electromagnetic signals to detect underground pipes, and you can rent or purchase them from hardware stores. Better still, you can hire a professional to do the job for you!

Step 4: Look for manhole covers or inspection points

Another way to find out how to find drainage plans for my house is to look for manhole covers or inspection points. They’re access points that plumbers and maintenance workers use to inspect and repair the stormwater system. Look for round or rectangular shapes made of metal or concrete.

Found one?:

  • Lift the cover (carefully!)
  • Take a look inside
  • Did it give you a better idea of where your stormwater pipes are located and how they’re laid out?

Step 5: Trace the path of your gutters & downpipes

Your gutters and downpipes are a key part of your stormwater system. To know how to find stormwater drains on your property, start by tracing the path of your gutters and downpipes. Follow them from your roof to the ground, and see where they lead. In many cases, they’ll connect directly to the stormwater pipes.

Still unsure? Try pouring water into your gutters or downpipes and watch where it flows. It will help you identify the location of your stormwater drains.

Step 6: Consult a professional

Tried all of that and still can’t locate your stormwater pipes? It’s probably time to call in the experts.

Professional plumbers have the tools, knowledge, and experience to quickly and accurately locate stormwater systems – even if they’re buried deep underground.

At Fix-It Right Plumbing, we specialise in helping homeowners like you find and maintain their stormwater systems. Do you need help:

  • Locating your pipes?
  • Repairing a blocked drain?
  • Understanding your stormwater plans?

Our friendly team is always here to help. Whether you need Melbourne blocked drain plumbers, Canberra drain cleaning experts, or Geelong drainage specialists, we’ve got you covered. We use the most advanced techniques, like CCTV drain cameras and hydro-jetting, to diagnose and fix every issue, ensuring your stormwater system works efficiently all year round.

Why professional help is worth it

Is it possible to locate your stormwater pipes on your own? It probably is – as we’ve tried to explain! However, some situations simply require professional help, and there’s nothing we can do about it!:

Complex systems: If your property has a large or complex stormwater system, it can be difficult to navigate without expert guidance.

Blockages or damage: If you suspect your stormwater pipes are blocked or damaged, a plumber can use specialised equipment to identify and fix the problem.

Peace of mind: Knowing that your stormwater system is in good hands can save you time, money, and stress in the long run.

Stop stressing about your stormwater pipes!

Are you stressing about finding your stormwater pipes? It can feel daunting at first, but a little patience, reinforced with the right approach, and it really is do-able! But if you still find yourself stuck, the experts are only ever just around the corner.

Here At Fix-It Right Plumbing, we can help with all your stormwater needs. Whether you’re learning how to locate stormwater pipes or need a little extra advice about maintaining your system, our friendly team is only ever a single shout away. So let’s make sure your stormwater system is working as it should – so you can focus on the things you really know and care about!

Remember, if you ever feel overwhelmed about stormwater or any other plumbing issue, Fix-It Right Plumbing is only ever a single call or message away.

Sitemap

Filed Under: How to guide

Stormwater Pits: Are They Right For You And How To Install One

By Richard Foster

Stormwater pit installation
Australia may be famously dry, but that doesn’t mean it doesn’t rain – and sometimes, it can be absolutely torrential! Managing that rainwater effectively is absolutely essential for protecting your property from water damage, erosion, and flooding. Because if your yard turns into a soggy mess every time it rains heavily, or you’ve noticed pooling water – especially near your home’s foundation – a stormwater pit could be the solution.

What is a stormwater pit?

It’s a fairly simple structure, typically installed underground, that is designed to collect and manage rainwater runoff. Basically, it serves as a mini reservoir, gathering water from surrounding areas like your driveway, roof and yard, and directing it into the stormwater drainage system.

How does a stormwater pit work?

The pit collects excess water, storing it temporarily before releasing it into the stormwater system or another outlet. A typical stormwater pit installation includes a grated inlet for water collection and a connection to underground pipes that direct the water away from your property.

Is a stormwater pit right for you?

Does it sound like residential stormwater pit installation could be right for your property? Before we get into how to install a drainage pit, consider the following:

THE PROS:

  • Prevents flooding by keeping water from pooling on your property during heavy rains.
  • Minimises the risk of structural damage to your home and property, especially your foundation.
  • Versatile and suitable for a variety of applications, from residential backyards to large driveways.
  • Once installed, it requires minimal maintenance to function extremely cost-effectively.

THE CONS:

  • It may require significant digging and space, depending on your property’s size.
  • Installation can be complex, making DIY particularly tricky if you’re unfamiliar with drainage systems.
  • Without regular maintenance, debris can clog the pit.

But if water is pooling regularly on your property and you have the space, it’s a good bet that a stormwater pit is the perfect solution. But wait! Could it be blocked drains are the problem rather than an inadequate stormwater drainage system? This is why arranging an inspection with a local drain plumber in Melbourne is recommended before any work commences. Fix It Right Plumbing can also send out a drainage specialist in Canberra or a Geelong drain plumber to assist.

Stormwater pits VS other drainage systems

Hopefully, you’ve seen by now that stormwater pits are extremely effective – but it’s important to note that they aren’t the only drainage solution. Here’s how they compare to your other options:

Stormwater pits: Best for managing large volumes of rainwater in one area, such as driveways or patios, drainage pit installation often means connection to the broader stormwater system for water disposal.

Direct stormwater connection: The straightforward solution where rainwater is channelled directly from your roof, driveway, or yard into council-maintained stormwater drains. While highly efficient in suburban areas with established drainage networks, additional measures can sometimes be required.

French drains: They’re trenches filled with gravel and a perforated pipe, but better suited for widespread water issues across a property.

Soakaways: Not common in residential areas, these underground pits filled with gravel – allowing water to slowly seep into the soil – are not suitable for many types of dense, clay-rich Australian soils and extreme downpours.

How a Plumber Installs a Stormwater Pit: A Step-by-Step Guide

Installing a stormwater pit is a crucial task in managing excess rainwater and preventing property damage. While it may seem straightforward, professional installation ensures compliance with local regulations, correct water flow, and long-term reliability. Here’s how a qualified plumber or drainage specialist handles stormwater pit installation.

1. Assess the Site and Drainage Requirements

A professional starts by evaluating the site, identifying areas of poor drainage, and determining the best location for the stormwater pit. This involves:

  • Checking for existing drainage systems and council stormwater connections
  • Identifying the natural flow of rainwater on the property
  • Locating underground utilities to avoid damage during excavation
  • Ensuring compliance with local drainage regulations

A plumber will also calculate the appropriate size of the stormwater pit based on the expected water volume and runoff areas.

2. Selecting the Right Stormwater Pit

Depending on the property’s needs, a plumber may install a plastic, concrete, or polymer stormwater pit. The choice depends on factors like:

  • Load requirements: High-traffic areas may need reinforced concrete pits.
  • Water volume: Larger pits with multiple outlets may be necessary for areas with heavy runoff.
  • Soil conditions: Clay-heavy soils may require additional filtration measures.

3. Excavation and Ground Preparation

Using excavation equipment, a plumber digs a hole large enough to accommodate the pit and surrounding drainage materials. The excavation must:

  • Be deep enough to allow proper water flow into the stormwater system
  • Have a slight slope to encourage efficient drainage
  • Allow for additional space around the pit for gravel and bedding materials

Once the hole is ready, a layer of compacted gravel is placed at the base to provide stability and promote water filtration.

4. Installing the Stormwater Pit and Connecting Pipes

With the pit in position, a plumber connects PVC or concrete stormwater pipes to ensure proper water flow. This process involves:

  • Cutting and securing inlet and outlet pipes using appropriate fittings
  • Sealing all connections to prevent leaks
  • Checking gradients to maintain a consistent flow of water toward the outlet

If the stormwater pit connects to an existing drainage system or the council’s stormwater network, a licensed plumber ensures it complies with local council regulations and obtains necessary approvals.

5. Backfilling and Securing the Pit

To provide support and prevent shifting over time, the plumber carefully backfills around the stormwater pit using:

  • Gravel layers for proper drainage and structural support
  • Geo-fabric material to prevent soil from clogging the system
  • Compacted soil or concrete edging around the top to stabilise the pit and prevent movement

6. Installing the Grate and Testing the System

The final steps involve securing the stormwater grate and testing the entire system to ensure optimal performance. This includes:

  • Attaching the grate to keep out large debris
  • Simulating heavy rainfall by running water through the system
  • Checking for proper water flow and drainage efficiency
  • Inspecting all connections to confirm there are no leaks or blockages

Why Professional Installation Matters

While stormwater pits might seem like a straightforward installation, professional plumbers ensure:

  • Correct positioning and water flow to prevent pooling and ineffective drainage
  • Proper integration with existing stormwater systems for long-term reliability
  • Compliance with council regulations, avoiding costly fines or rework
  • Reduced risk of failure, saving homeowners from future repairs and water damage

Call us for expert stormwater solutions

Installing or maintaining a stormwater pit doesn’t have to be stressful – especially if you get the friendly guys at Fix-It Right Plumbing to do it for you! We not only specialise in residential stormwater pit installation, but also maintenance, repairs and ongoing plumbing and drainage inspections. Need some extra advice about how to install a stormwater pit, or professional assistance with your drainage system? Here at Fix-It Right Plumbing, we’re always just around the corner – so give us a shout!

Sitemap

Filed Under: How to guide

What To Do About A Leaking Hot Water System

By Richard Foster

Leaking hot water system from the bottom
Few home maintenance issues are as inconvenient, worrying, and potentially expensive and even dangerous as a hot water system leaking. You’re no doubt concerned about how serious the issue might be and whether it’s going to leave you with a hefty repair bill or a cold shower – or both! Continue reading “What To Do About A Leaking Hot Water System” »

Sitemap

Filed Under: How to guide

6 Simple Steps To Unblock A Sink With No Experience

By Richard Foster

How to unblock a sink drain

A blocked sink may be incredibly common, but that doesn’t make it any less of a frustrating household plumbing issue. Whether you’re rinsing off dishes or brushing your teeth, a clogged sink drain may not seem like a huge deal, but it can massively disrupt your day and even lead to unpleasant odours or water damage. Before you panic and call a plumber straight away, there are steps you can take to learn how to unblock a sink and tackle the problem yourself. With a little patience and some basic tools, no matter your skill level, you may just be able to fix the issue without spending a dime.

In our exclusive guide, we’ll walk you through how to unblock a sink drain – with practical advice for everyone from the not-so-handy to the moderately skilled. And if all else fails, don’t worry—our skilled and affordable Melbourne drain plumbers, Canberra blocked drain experts, and Geelong drain cleaning specialists at Fix-It Right Plumbing are just a call away.

Step 1: Remove standing water

Just want to unblock sink drains that are bothering you? Well, if your sink is clogged and filled with water, the first step is to clear it out.

For the not-so-handy: Use a small container or cup to manually scoop out the water into a bucket. Be patient and try to get as much as possible. If your sink is still slow to drain after this, don’t worry – this is just the beginning.

For the moderately handy: Consider using a wet/dry vacuum to suck up the water quickly and efficiently. It’s a brilliant way to unclog drain sinks, but you’ll obviously need the vac or need to borrow or rent one. But rest assured – these devices are great for removing excess water before tackling the blockage.

What a plumber would do: A plumber will assess the sink’s drainage system and use professional-grade tools to pump out water and start identifying the blockage.

Step 2: Inspect the drain for visible blockages

Many sink blockages are caused by food particles, hair, or grease that have built up over time.

For the not-so-handy: Remove the drain cover and use a torch to check for visible debris. If you can see the blockage, try pulling it out using a bent wire coat hanger or a pair of tongs.

For the moderately handy: Use a drain snake or a similar tool to probe deeper into the drain and dislodge clogs further down the pipe.

What a plumber would do: A plumber will use specialised equipment, such as a plumber’s auger or CCTV drain camera inspection, to locate and remove blockages deep in the plumbing system.

Step 3: Use boiling water

Sometimes, a clogged sink drain can be cleared with nothing more than boiling water.

For the not-so-handy: Boil a kettle of water and carefully pour it down the drain in stages. This works particularly well for blockages caused by grease or soap scum.

For the moderately handy: After pouring the boiling water, use a plunger to apply suction to the drain and help move the blockage along.

What a plumber would do: If boiling water and plunging aren’t effective, a plumber may flush the drain with high-pressure water or chemical solutions designed for tougher clogs.

Step 4: Create a DIY solution

Having trouble unclogging sink drains? Homemade remedies can sometimes work wonders for unblocking a sink.

For the not-so-handy: Mix one cup of baking soda with one cup of vinegar and then:

  • Pour the mixture into the drain
  • Let it sit for 15-30 minutes
  • Rinse with hot water.

This method is safe, natural, and surprisingly effective for minor clogs.

For the moderately handy: After applying the baking soda and vinegar solution, consider using a plunger to amplify the effect. The combination of the solution and suction can be very effective.

What a plumber would do: Plumbers may use professional-grade enzymatic cleaners or other advanced chemical solutions to dissolve tough clogs without damaging your pipes.

Step 5: Check the U-bend

How to unblock a sink with water in it? Sounds like the U-bend is the culprit! The U-bend or P-trap under the sink often traps debris and is a common source of clogs that fill up that sink and then overflow it.

For the not-so-handy: Don’t feel bad, because many of the not-so-handy of you out there wouldn’t and shouldn’t attempt this. For the adventurous:

  • Place a bucket under the sink to catch any water
  • Carefully unscrew the U-bend
  • Empty it out
  • Clean it thoroughly
  • Re-attach.

For the moderately handy: While cleaning the U-bend, use a flexible drain snake to probe deeper into the pipe and ensure the blockage is fully removed.

What a plumber would do: A plumber will dismantle and clean the U-bend with professional precision and inspect the entire pipe system for additional blockages or structural damage. Knowing how to unclog sink plumbing is never an issue for the guys in the know!

Step 6: Test the drain

Once you’ve tried a few methods, it’s important to test whether the blockage has been resolved.

For the not-so-handy: Run the tap and observe whether the water flows freely. If it drains smoothly, congratulations – you’ve successfully unblocked your sink!

For the moderately handy: Still not working? Don’t give up your journey into how to unblock the sink quite yet!

So if water still drains slowly, repeat one or more of the steps above to ensure the blockage is fully cleared.

What a plumber would do: How to unclog a sink? Calling a plumber is always the easiest and most thorough way! A licensed and experienced tradie will perform a thorough test of the entire plumbing system to confirm that all blockages are resolved and that your pipes are in good working condition.

When to call a professional

Tried everything? Hands dirty? Still unsure how to unblock a drain sink? It’s time to call in the experts. That’s because a persistent or severe blockage isn’t just annoying and potentially damaging, it may indicate a deeper and much more expensive and destructive problem – such as tree roots invading your pipes or a broken sewer line. Attempting to fix such issues yourself can lead to further damage and even bigger bills than you ever imagined.

Why choose Fix-It Right Plumbing?

Sink clogged? At Fix-It Right Plumbing, we specialise in solving all types of plumbing problems – including how to unblock a sink, how to unblock a drain, and so much more. With experienced and fully licensed Melbourne plumbers, Geelong plumbers, and Canberra plumbers, we’re always ready to help when DIY solutions fall short. We pride ourselves on fast response times, upfront pricing, and long-lasting solutions that give you peace of mind.

So don’t let a blocked sink disrupt your day, and instead give us a shout right here at Fix-It Right Plumbing. Our friendly team will have your plumbing running perfectly in no time.

Sitemap

Filed Under: Blocked Drains, How to guide

What to do if you smell gas inside your home

By Richie

Open all doors and windows to ventilate the room – The first thing you should do is open and window or door you can to get some fresh air inside. Find the nearest door to you and do it straight away. This will lessen the concentration of gas in the air and make it easier to breath

Remove people and pets from the area - Getting everyone inside the house to safety is key here. Helping family members to a sheltered place outside away from the gas leak is priority. Ensure all pets have been removed and everyone in the house has been accounted for

Turn off all ignition sources – IF you have any flames in your home make sure they are turned off (Cookers, Stoves) Ensure any smokers in the house do not light up cigarettes

Isolate the gas supply to your home – You can find the gas shut off valve to your home located on the gas meter. If you know where your gas meter is and can safely access the area, then shut off your gas supply. This will stop the gas leak from getting worse.

Call for help – Call a plumbing professional who specialises in gas leaks and tell them you have an emergency. They will fully understand your position and will arrange for a qualified plumber to attend and get your leak found and fixed.

Sitemap

Filed Under: gas, How to guide

Copyright © 2026 · Fix-It Right Plumbing

[brb_collection id=25646]